
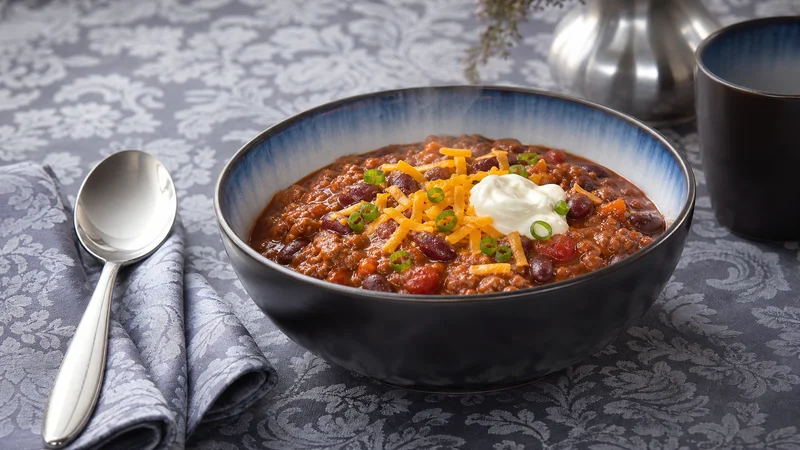
Classic Beef Chili
Classic beef chili is ground beef seared with diced onions and peppers, layered with chili powder, cumin, and tomatoes, then simmered with kidney and pinto beans until thick and rich. Served hot with cheese, sour cream, and your favorite toppings.
Chili can survive a lot of bad decisions, which may be why people keep testing the limits. This one does not need chocolate, cinnamon, twelve mystery peppers, or a secret ingredient whispered over the pot at midnight. It starts with ground beef browned with onion and peppers, then builds the flavor where it belongs: chili powder, cumin, tomatoes, kidney beans, and pinto beans simmered together until the liquid thickens and everything tastes like it has actually met.
The simmer is doing more than warming dinner. It gives the spices time to lose their raw edge, lets the beans absorb the seasoned tomato base, and reduces the sauce until it clings to the beef instead of sloshing around it. Give it the full time, stir when it needs you, and adjust the seasoning near the end. Then add cheese, sour cream, onions, crackers, cornbread, or whatever your household has legally declared belongs on chili. The pot is sturdy enough to handle the argument.
Ingredients
- 2 pounds ground beef, preferably 80/20 or 85/15
- 1 tablespoon vegetable oil, if needed
- 1 large yellow onion, diced
- 1 green bell pepper, diced
- 1 red bell pepper, diced
- 4 cloves garlic, minced
- 3 tablespoons chili powder
- 2 teaspoons ground cumin
- 2 teaspoons smoked paprika
- 1 teaspoon dried oregano
- 1/2 teaspoon ground coriander
- 1/4–1/2 teaspoon cayenne pepper, optional
- 2 teaspoons kosher salt, plus more to taste
- 1 teaspoon freshly ground black pepper
- 2 tablespoons tomato paste
- 1 can crushed tomatoes, 28 ounces
- 1 can diced tomatoes, 14.5 ounces
- 1½ cups beef broth
- 1 tablespoon Worcestershire sauce
- 1 can kidney beans, 15 ounces, drained and rinsed
- 1 can pinto beans, 15 ounces, drained and rinsed
- 1 teaspoon brown sugar, optional
- 1 tablespoon apple cider vinegar or fresh lime juice
Instructions
- 1Heat a large Dutch oven or heavy-bottomed pot over medium-high heat. Add the ground beef and cook for 7–9 minutes, breaking it into small pieces with a wooden spoon, until browned and no longer pink. If the beef releases excessive grease, carefully drain most of it, leaving about 1 tablespoon in the pot. Transfer the browned beef to a bowl and set aside.
- 2Reduce the heat to medium. Add the onion, green bell pepper, and red bell pepper to the pot. Cook for 6–8 minutes, stirring occasionally, until softened and beginning to release their juices. Add the garlic and cook for 30 seconds, just until fragrant.
- 3Add the chili powder, cumin, smoked paprika, oregano, coriander, cayenne, salt, and black pepper. Cook for about 1 minute, stirring constantly. Toasting the spices briefly helps deepen their flavor — you should smell them become more fragrant.
- 4Stir in the tomato paste and cook for 2 minutes, stirring frequently, until it darkens slightly and begins sticking to the bottom of the pot.
- 5Return the browned beef to the pot. Add the crushed tomatoes, diced tomatoes, beef broth, Worcestershire sauce, and brown sugar if using. Stir well, scraping up any browned bits from the bottom of the pot. These bits contain deep flavor.
- 6Bring the chili to a gentle boil, then reduce the heat to low and partially cover the pot. Simmer for 45 minutes, stirring occasionally, until the flavors begin to marry.
- 7Stir in the kidney beans and pinto beans. Continue simmering uncovered for 25–35 minutes, stirring occasionally, until the chili is noticeably thicker and the flavors have blended together. Add a little more beef broth if the chili becomes thicker than desired.
- 8Stir in the apple cider vinegar or lime juice. Taste and adjust with additional salt, black pepper, chili powder, or cayenne as needed. The chili should be savory, balanced, and complex. Let it rest off the heat for 10 minutes before serving — this allows the flavors to settle.
Nutrition Information
Estimated per serving: 1 serving (calculated using 7 servings, the midpoint of the stated 6–8 range).
Estimated from the ingredients and quantities in this recipe using standard food-composition values. The calculation uses the midpoint of the stated yield range. Brand choices, trimming, cooking loss, optional ingredients, and actual portion size can change the numbers. How we calculate nutrition estimates.
Pro Tips
- Browning the beef thoroughly creates a deep, rich base. Do not rush this step — caramelization is flavor.
- Do not drain all the fat when browning the beef. That fat carries flavor and helps build the base. Leave about 1 tablespoon.
- Toasting the spices in the pot for about 1 minute before adding the liquid awakens them and deepens their flavor — you will smell the difference immediately.
- Do not rush the simmering time. Chili improves as the tomatoes, meat, and spices cook together. The flavor is often even better after refrigeration overnight and reheating.
- Chili thickness depends on how long it simmers uncovered. For thicker chili, simmer longer. For thinner chili, add extra beef broth in small amounts.
Substitutions
Storage Instructions
Store chili in an airtight container in the refrigerator for up to 5 days. Chili actually improves in flavor after a day or two as the spices continue to meld. Reheat gently on the stovetop over medium-low heat, stirring occasionally, adding a splash of beef broth if it has thickened too much. Chili also freezes beautifully for up to 3 months in freezer bags or containers.
Make Ahead
Chili is one of the best make-ahead dishes. Prepare it completely up to 3 days before serving, then refrigerate covered. Reheat when you are ready. You can also assemble everything through step 5 (before the first simmer) up to 24 hours ahead, then continue cooking when needed. The flavor will only improve.
Frequently Asked Questions
How thick should the chili be?
Chili thickness is a matter of preference. For thicker chili, simmer uncovered longer in step 7, allowing more liquid to evaporate. For thinner chili, add extra beef broth a splash at a time. The consistency should be pourable but not soupy, with the beans and meat suspended in sauce.
Is this Texas chili or bean chili?
This is classic American chili — beef and beans. Traditional Texas chili is bean-free, which is a different beast entirely. This version is what most home cooks and families make, and it is exactly what it should be.
What toppings go best with chili?
Shredded cheddar cheese, sour cream, chopped green onions, diced red onion, sliced jalapeños, and avocado are all classics. Serve with cornbread, crackers, or tortilla chips. The toppings are part of the experience — let people build their own bowl.
Can I make chili ahead of time?
Yes, it is one of the best make-ahead dishes there is. Make it completely up to 3 days before serving and refrigerate it covered; the flavor only improves as the spices meld.
How do I store leftover chili?
Refrigerate it in an airtight container for up to 5 days, reheating gently over medium-low heat with a splash of beef broth if it has thickened too much. It also freezes well for up to 3 months.
Make It a Meal
Pair this recipe with a side, bread, and something sweet from the FAFO Kitchen.