
Beginner Sourdough Bread
Beginner sourdough bread is made from flour, water, salt, and sourdough starter. It involves mixing, stretch-and-folds, bulk fermentation, shaping, cold proofing overnight, and baking in a Dutch oven. Active time 30 minutes; total time 15–20 hours with fermentation.
Sourdough is bread with a calendar. Flour, water, salt, and 100 grams of active starter become one loaf, but only after the starter wakes up, the dough rests, gets folded, ferments, chills overnight, bakes in a screaming-hot Dutch oven, and then—cruelest of all—sits on a rack while you are specifically instructed not to cut it. This is why people start talking about their sourdough starter like a difficult little roommate. It eats on a schedule, changes behavior with the weather, and somehow still gets credit when dinner goes well.
The useful thing for a beginner is that most of the time is waiting, not labor. After a 30-minute rest, salt goes into the shaggy dough, followed by several sets of stretch-and-folds over about two hours. Bulk fermentation continues until the dough has risen roughly 50 to 75 percent and looks puffy with visible bubbles. That visual change matters more than blindly obeying the clock because a warm kitchen and a cool kitchen do not ferment at the same speed.
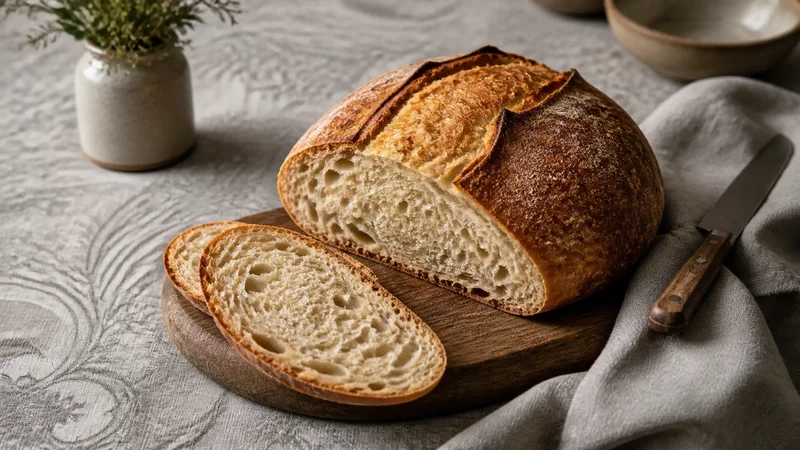
After an 8- to 16-hour cold proof, score the loaf and bake it covered in a preheated Dutch oven at 475°F, then uncovered at 450°F until the crust is deep golden and the center reaches 208 to 210°F. Wait at least an hour before slicing so the interior can finish setting. The process is slow, mildly obsessive, and deeply inconvenient to anyone who enjoys instant gratification. The crackling crust and tangy, open crumb are why people keep doing it anyway.
Ingredients
Dough
- 500 grams bread flour (about 4 cups)
- 350 grams warm water (about 1½ cups)
- 100 grams active sourdough starter
- 10 grams kosher salt (about 2 teaspoons)
Equipment
- Large mixing bowl
- Dutch oven with lid
- Bench scraper (optional)
- Kitchen scale (highly recommended)
- Banneton basket or medium bowl lined with floured kitchen towel
- Parchment paper
Instructions
- 1Feed your sourdough starter 4–8 hours before baking. The starter is ready when it has doubled in size, looks bubbly, and floats in water. This indicates peak fermentation activity and strength.
- 2In a large bowl, combine warm water and active starter. Stir until mostly dissolved. Add bread flour and mix with your hands or a wooden spoon until no dry flour remains and a shaggy dough forms. Cover and let rest for 30 minutes. This resting period is called the autolyse and develops gluten naturally.
- 3Sprinkle salt over the dough. Mix thoroughly by pinching and folding the dough until the salt is fully incorporated into the dough. This takes about 1–2 minutes. Cover and let rest for 30 minutes.
- 4Perform one set of stretch-and-folds: Grab one side of the dough, stretch it upward, and fold it over the center. Rotate the bowl a quarter turn and repeat four times total. This is one complete set. Cover and rest 30 minutes. Repeat this process 3–4 times over the next 2 hours. The dough will become noticeably smoother and stronger with each set of folds.
- 5Cover the dough and allow it to bulk ferment until it has increased in volume by 50–75%. Depending on room temperature, this usually takes 4–6 hours from when the starter was mixed in. The dough should look puffy with some bubbles visible on the surface and sides.
- 6Turn the dough onto a lightly floured work surface. Shape it into a tight round by gently pulling the surface toward the bottom to create surface tension. Transfer the dough seam-side up into a floured banneton basket or a medium bowl lined with a floured kitchen towel.
- 7Cover the shaped dough and refrigerate for 8–16 hours. This overnight cold proof develops deep flavor and makes scoring much easier. The dough will rise slowly in the cold.
- 8Place a Dutch oven with its lid into the oven. Preheat to 475°F (246°C) for at least 30 minutes. The Dutch oven must be very hot before the dough goes in.
- 9Turn the cold dough out onto parchment paper. Using a sharp lame or razor blade, make one ½-inch-deep slash across the top. Carefully transfer the dough into the hot Dutch oven. Cover with the lid. Bake for 20 minutes with the lid on. Remove the lid. Reduce the oven temperature to 450°F (232°C). Bake another 20–25 minutes until the loaf is deep golden brown and the internal temperature reaches 208–210°F on a meat thermometer.
- 10Transfer the bread to a wire rack. Allow it to cool for at least one hour before slicing. Cutting too early can result in a gummy interior. Wait until completely cool for the best texture and flavor development.
Nutrition Information
Estimated per serving: 1 slice (recipe makes 12).
Estimated from the ingredients and quantities in this recipe using standard food-composition values. Brand choices, trimming, cooking loss, optional ingredients, and actual portion size can change the numbers. How we calculate nutrition estimates.
Pro Tips
- Weighing ingredients with a kitchen scale provides the most consistent results. Volume measurements vary too much for sourdough to be reliable.
- Use an active, recently fed starter for the best rise and most reliable fermentation. A weak starter produces unpredictable results.
- Fermentation times will vary depending on the temperature of your kitchen. Warmer kitchens ferment faster; cooler kitchens slower. Watch the dough, not the clock.
- Resist adding extra flour if the dough feels slightly sticky. Higher hydration (wetter dough) produces a lighter crumb with more open structure.
- Patience is the key ingredient. Sourdough rewards time more than effort. Slow fermentation develops flavor that fast bread cannot achieve.
Substitutions
Storage Instructions
Store cooled sourdough in a paper bag or bread box at room temperature for up to 4 days. The crust may soften slightly but the flavor deepens. For longer storage, slice the bread and freeze in a freezer bag for up to 3 months. Thaw and toast before serving.
Make Ahead
You can refrigerate the shaped dough for 8–16 hours before baking. This cold proof actually improves flavor and is the recommended method. You can also freeze the shaped dough after 2 hours of room-temperature proof. Thaw overnight in the refrigerator before baking.
Frequently Asked Questions
How do I know if my starter is ready?
A ready starter should have doubled in volume, be full of bubbles, and float in water. If you drop a spoonful into a glass of water, it should float to the surface. This float test is the most reliable indicator of peak fermentation.
What if my kitchen is cold?
Cold kitchens ferment slower. You can use a proofing box, place the dough on top of a warm (but not hot) refrigerator, or wrap it in a heating pad set to low. Expect fermentation to take 6–8+ hours in a cold kitchen instead of 4–6 hours.
Can I bake without a Dutch oven?
A Dutch oven is ideal because it traps steam, which creates the crispy crust and oven spring. You can use a covered broiler pan or baking vessel, but the results will be less dramatic. Alternatively, score the bread, place it on a preheated baking sheet, and mist the oven walls with water several times during the first 20 minutes.
Why is my loaf dense?
A dense loaf usually means under-fermentation (didn't ferment long enough) or a weak starter. Fermentation should be 50–75% volume increase. If your starter sinks instead of floats, feed it daily for a few days until it becomes active and reliable.
How long can I refrigerate the shaped dough?
You can refrigerate shaped dough for 8–16 hours. After 16 hours, the dough begins to over-ferment and the flavor can become overly sour or the structure can break down. The overnight cold proof (8–12 hours) is ideal.